Google Tag Manager integration activation process

Operational guide to connect a site managed by the Permissor CMP to Google Tag Manager (GTM), used to manage and distribute tracking and marketing tags without manually editing the site code.

1. Prerequisites

Before starting the procedure, make sure you have the following requirements:

  1. 1. Active Permissor account with access to the dashboard of the company and of the website on which you intend to enable the integration.
  2. 2. Google Tag Manager Container ID (GTM-XXXXXXX) already created within your Google Tag Manager account. The value can be retrieved from the Admin → Install Google Tag Manager section of your account.
  3. 3. Sufficient permissions on the Permissor site to edit the Cookie → Integrations section.

2. Activation procedure

The procedure consists of five steps. Proceed in the indicated order, referring to the figures accompanying each step.

Step 1 - Access the site from the user dashboard

From your user dashboard, open the site on which you intend to apply the Google Tag Manager integration, selecting it from the list of the company's sites.
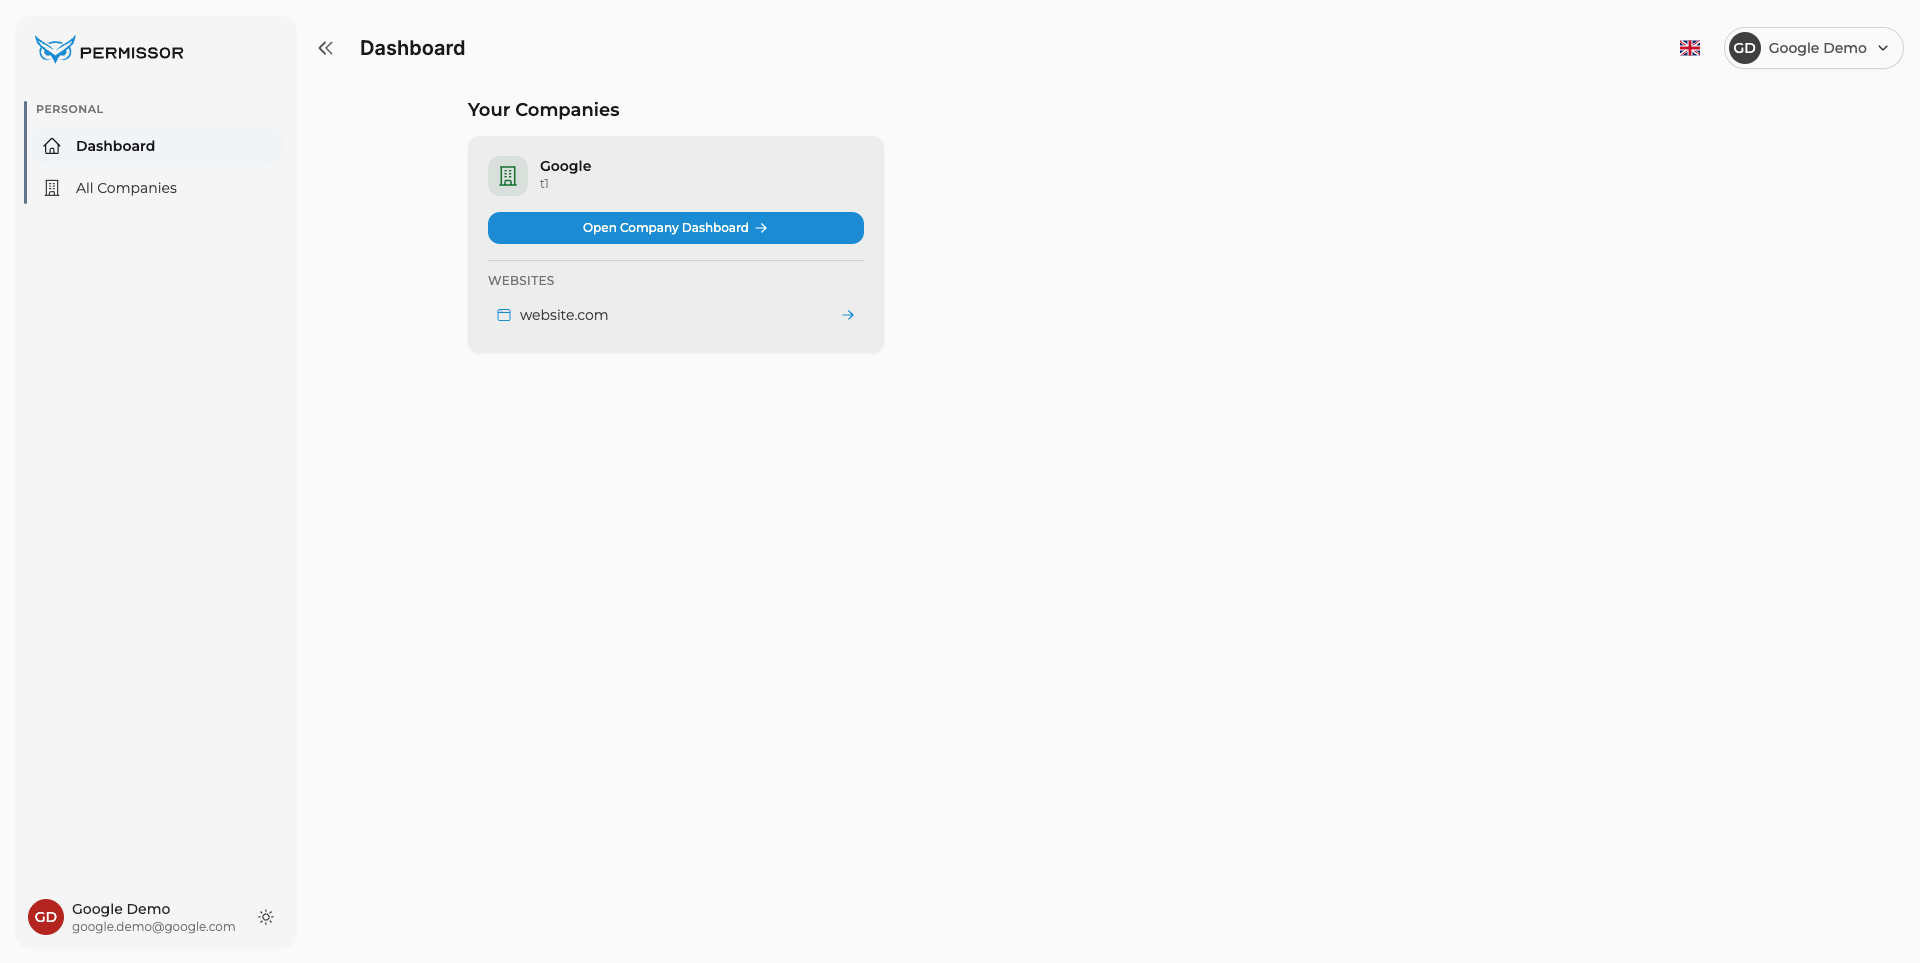
User dashboard with the list of companies and the target site selected

Figure 1 — User dashboard: selecting the target site.

Step 2 - Open the Integrations & TCF section

From the dashboard of the relevant site, open the Integrations & TCF section, reachable from the Cookies → Integrations & TCF item in the left-hand sidebar.

Site dashboard with the Integrations & TCF item in the sidebar

Figure 2 — Opening the "Integrations & TCF" section.

Step 3 - Select Google Tag Manager

Within the Integrations & TCF section, select the Google Tag Manager item from the list of available integrations.
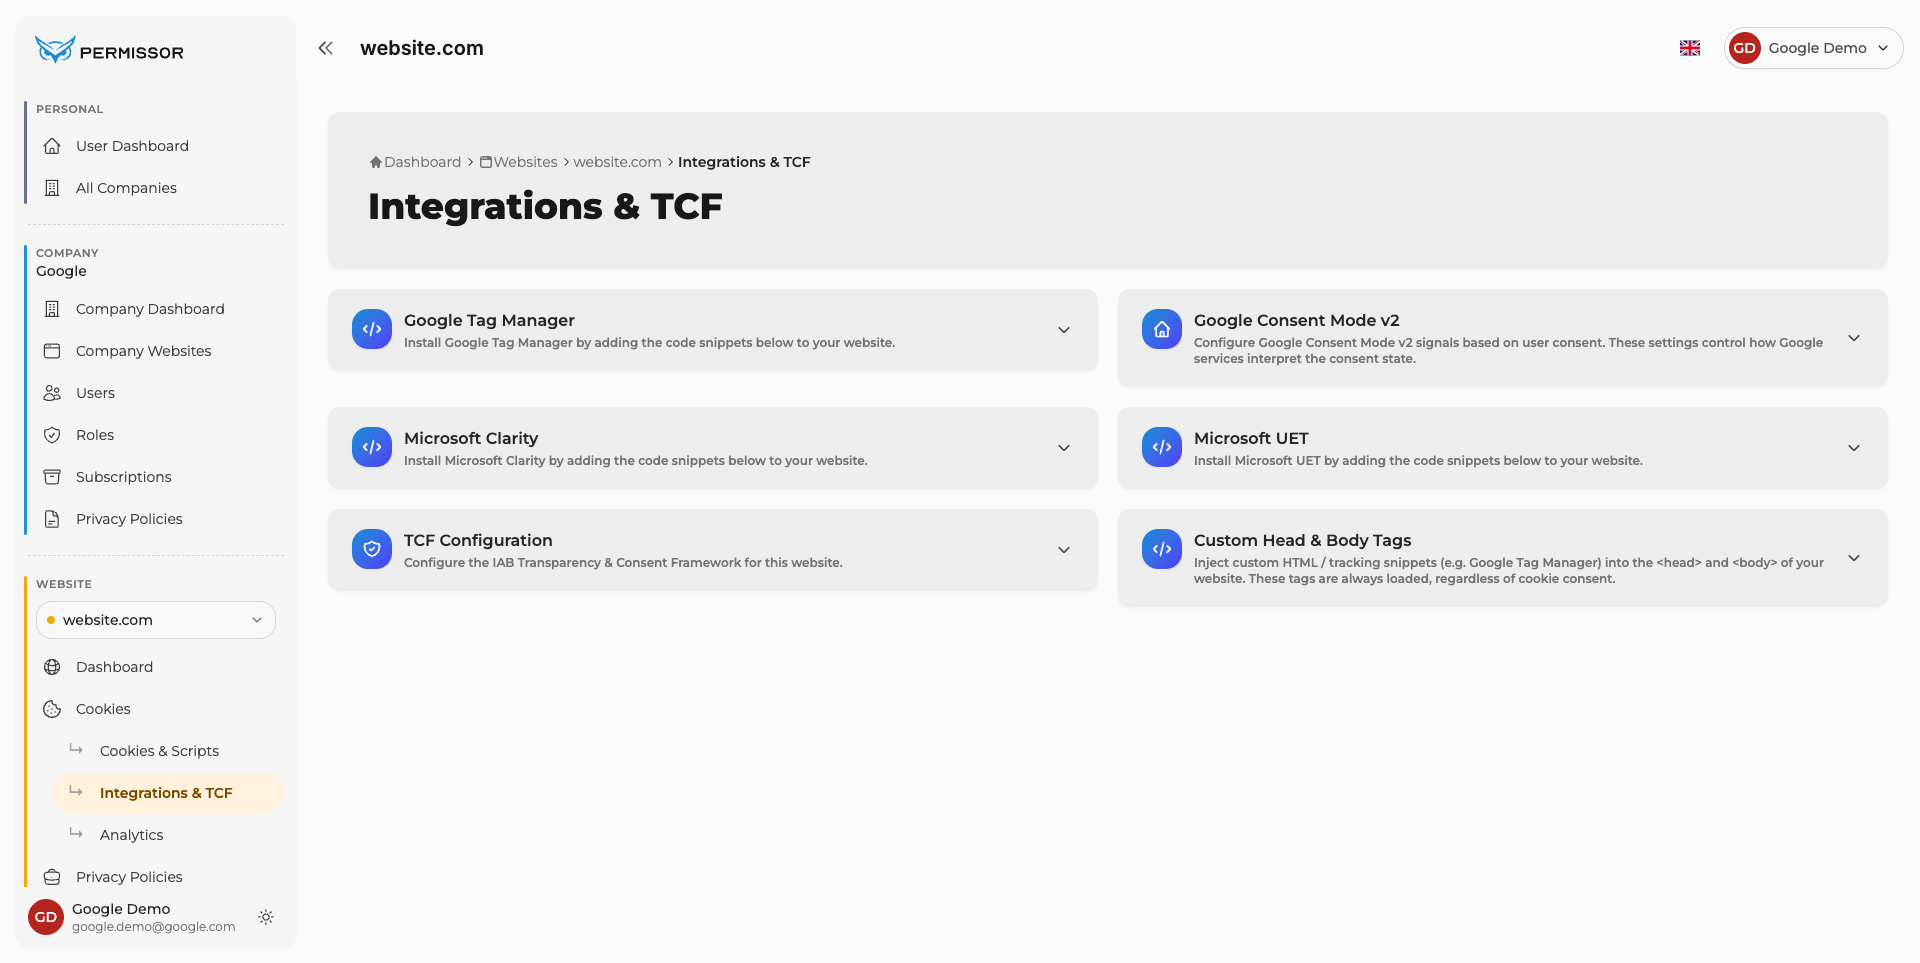
Google Tag Manager item in the list of available integrations

Figure 3 — Selecting "Google Tag Manager".

Step 4 - Expand the settings and add to website tokens

In the Google Tag Manager card, expand the Configuration Settings panel and click Add to website tokens.
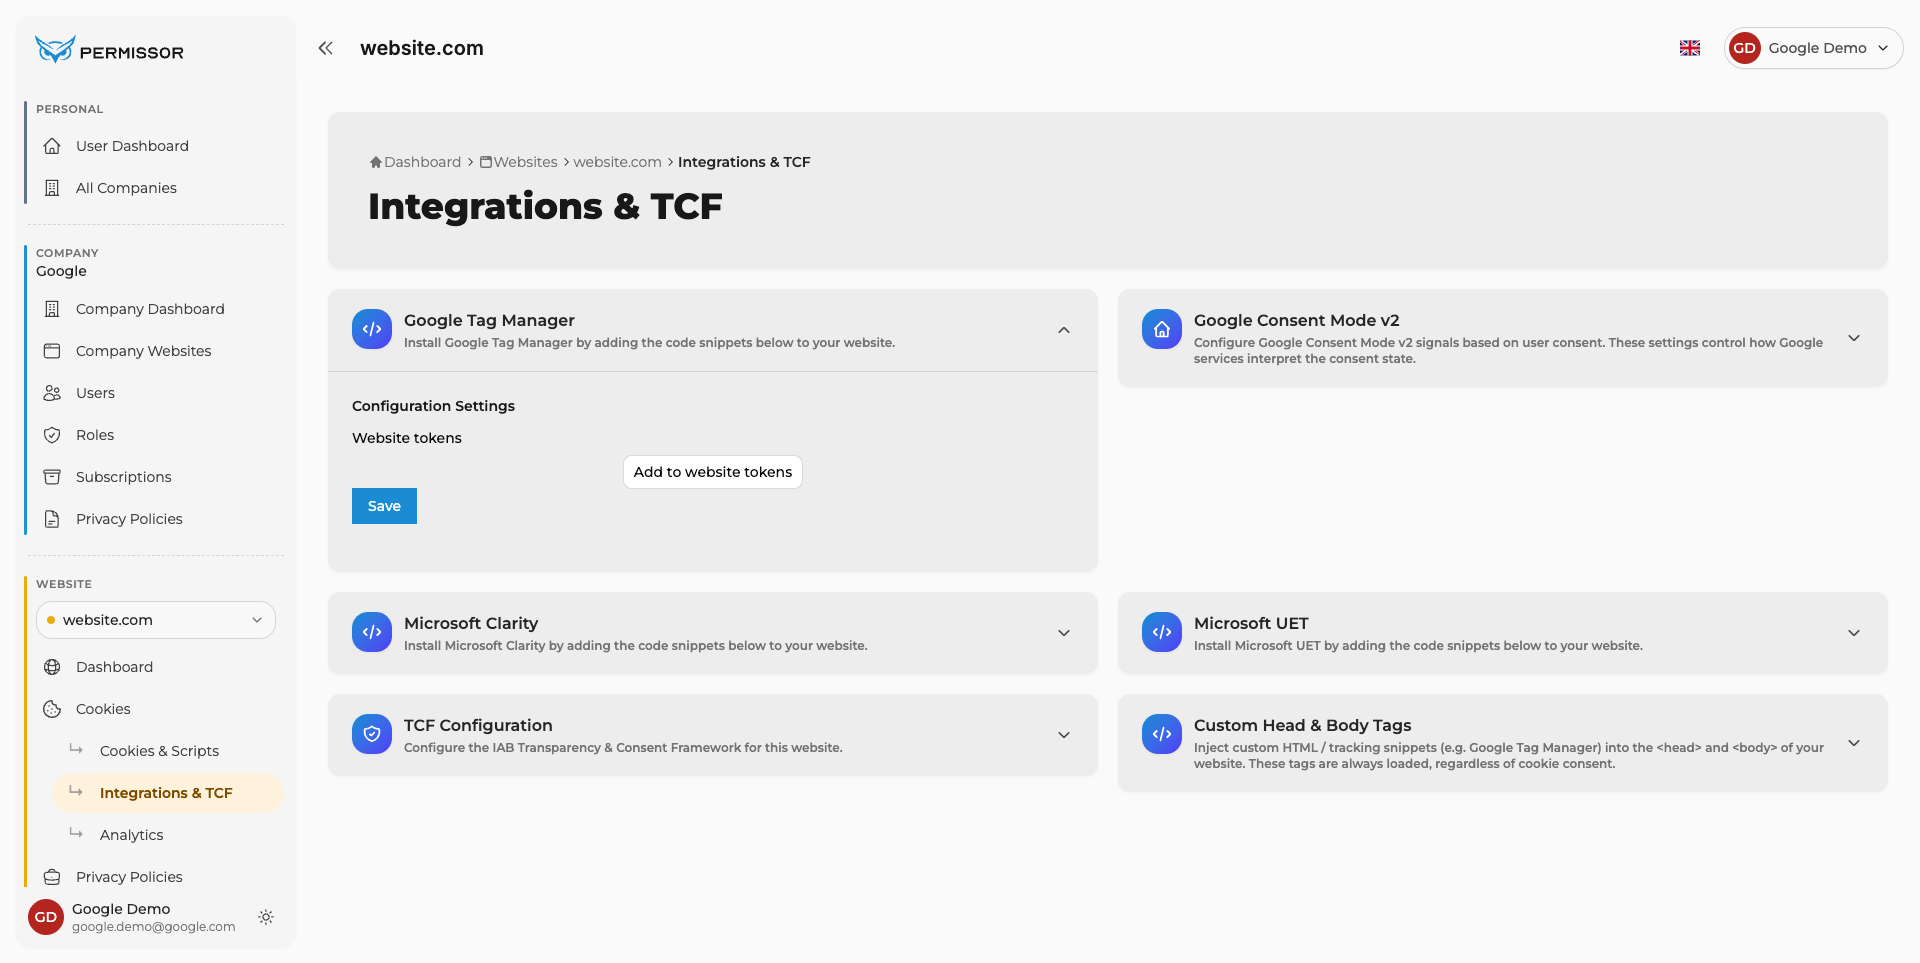
Expanded Configuration Settings panel with the Add to website tokens button

Figure 4 — Settings panel and the "Add to website tokens" button.

Step 5 - Enter the Container ID, enable Autoload and save

Enter your GTM Container ID (GTM-XXXXXXX) in the Token field, tick the Autoload checkbox and click the Save button to save the integration configuration.

What is Autoload?

With Autoload enabled, the Permissor CMP automatically loads the Google Tag Manager script into the website, with no need to paste additional code into the pages. If Autoload is left disabled, the Google Tag Manager script must be inserted manually in the site header.
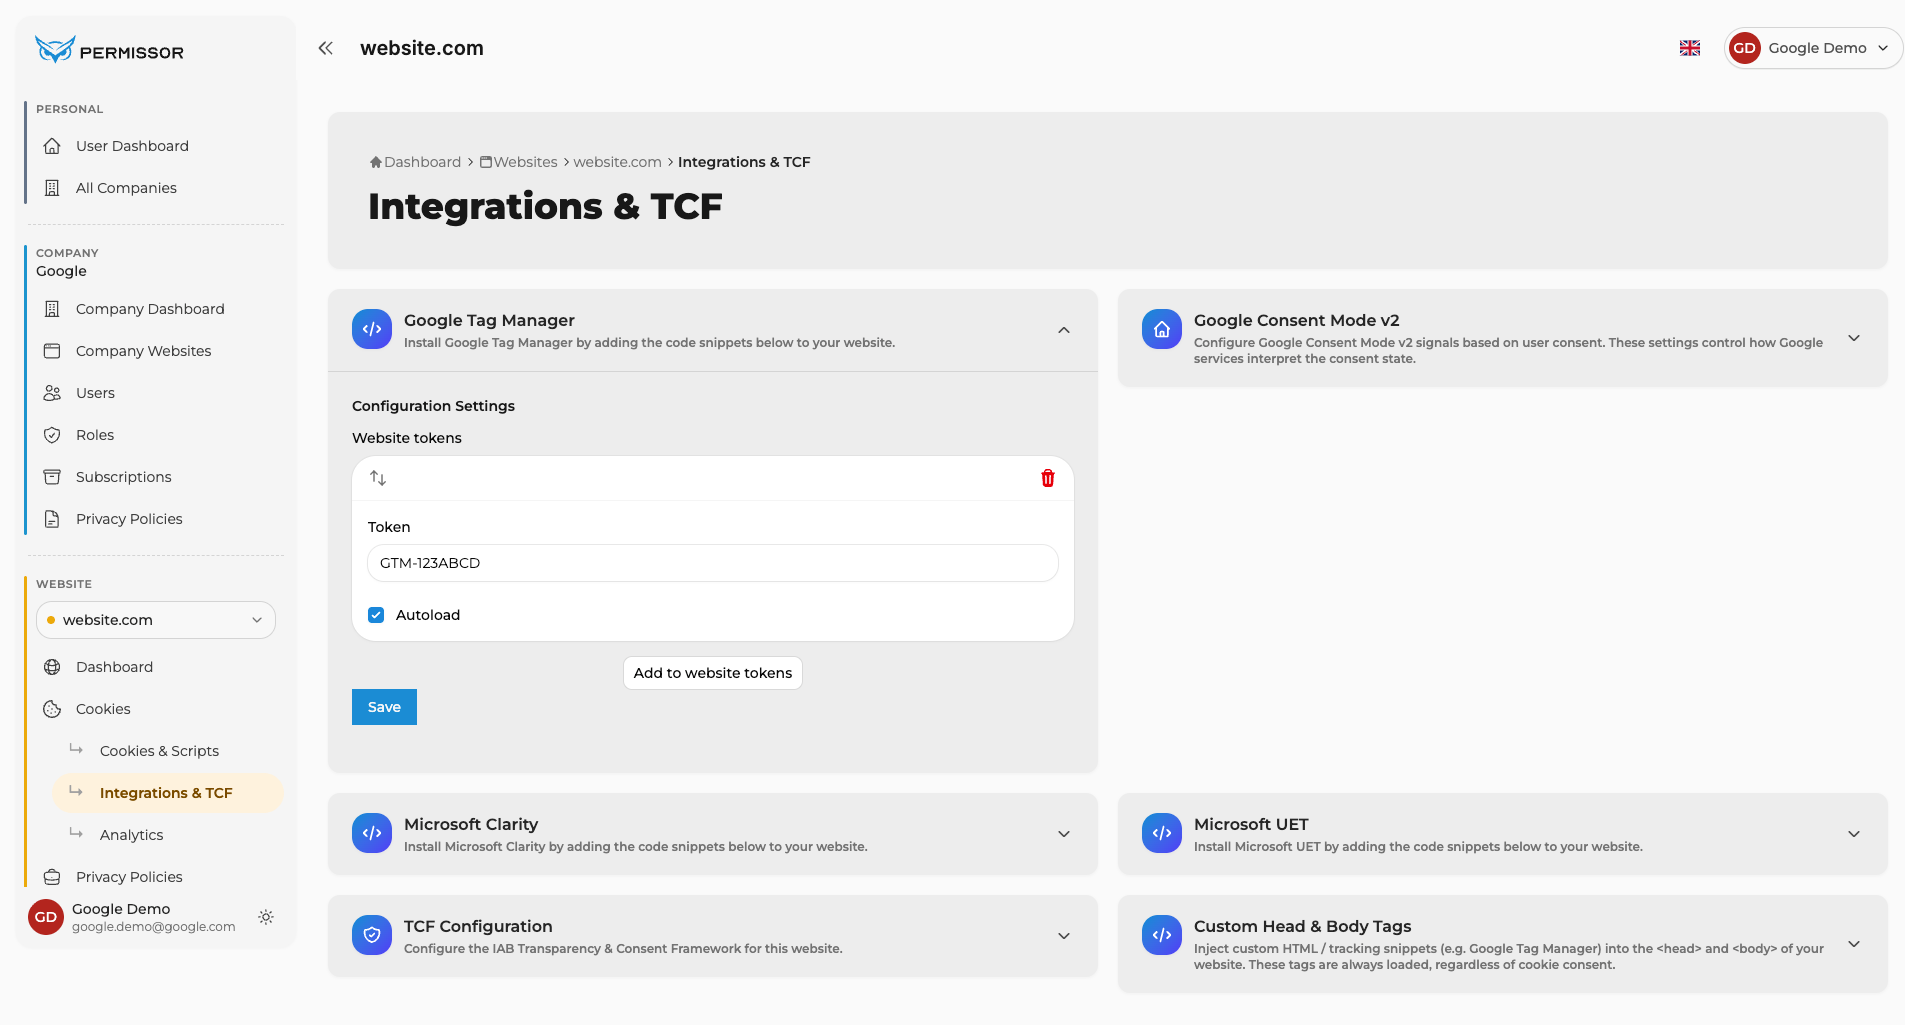
Token field with the GTM Container ID, Autoload checkbox enabled and the Save button

Figure 5 — Entering the Container ID, Autoload and saving.

3. Final check

At the end of the procedure, we recommend performing the following checks to confirm that Google Tag Manager is actually active:

  • Open the website on which the Permissor CMP is installed and accept statistics/marketing cookies through the banner.
  • Open the browser developer tools, Network tab, and filter for the string googletagmanager.com/gtm.js: the GTM container load call should be visible.
  • Alternatively, use Google Tag Manager's Preview mode or the Google Tag Assistant extension to verify that the container is connected and active.
  • If the check fails, make sure the Container ID entered in Permissor matches the one in your Google Tag Manager account and that the Autoload checkbox is actually enabled (or, alternatively, that the script was pasted manually into the site).